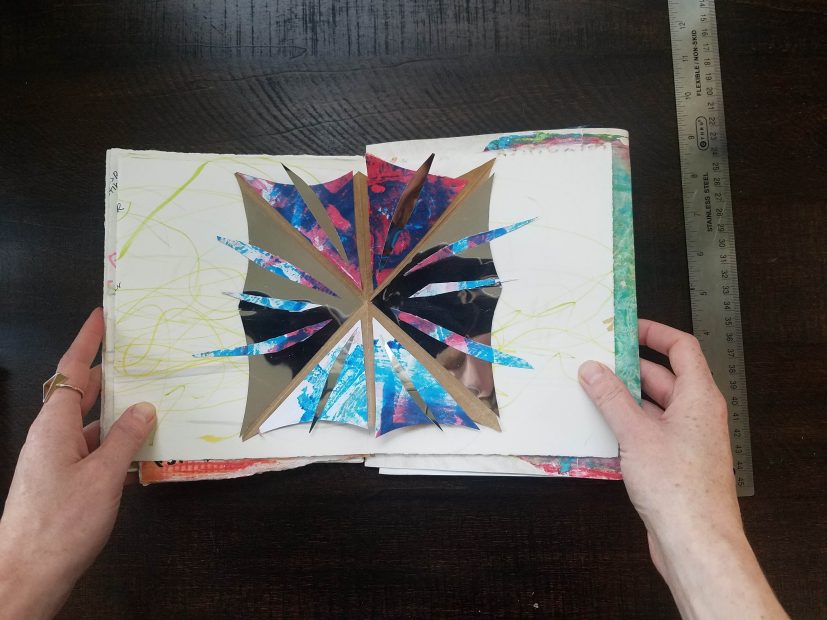
Inspired by Deana Lawson’s interest in portals and future-building, create a portal to your dream future inside a pop-up card. Craft a magical portal with reflective sticky paper, and let your true self shine through. Open your portal each time you need a reminder of where you’re going and who you want to be.
Materials:


Instructions:
1. Open the greeting card and lay it flat on a work surface. Using drawing materials, decorate the inside of the card with personal reflections and inspiring messages or drawings. Fill up the entire inside of the card top to bottom, above and below the fold. This will be the background to your portal. Consider these questions for inspiration:
- Who are you?
- Who do you want to become?
- What do you love about yourself?
- Where are you now?
- Where do you want to be in the future?
- What are your hopes for the future?
- What are you worried or scared about?
- How do you care for those you love?
- If you could change anything about your world, what would it be?
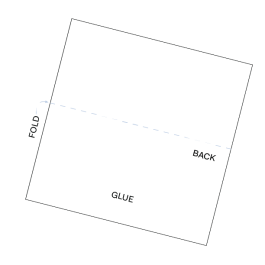
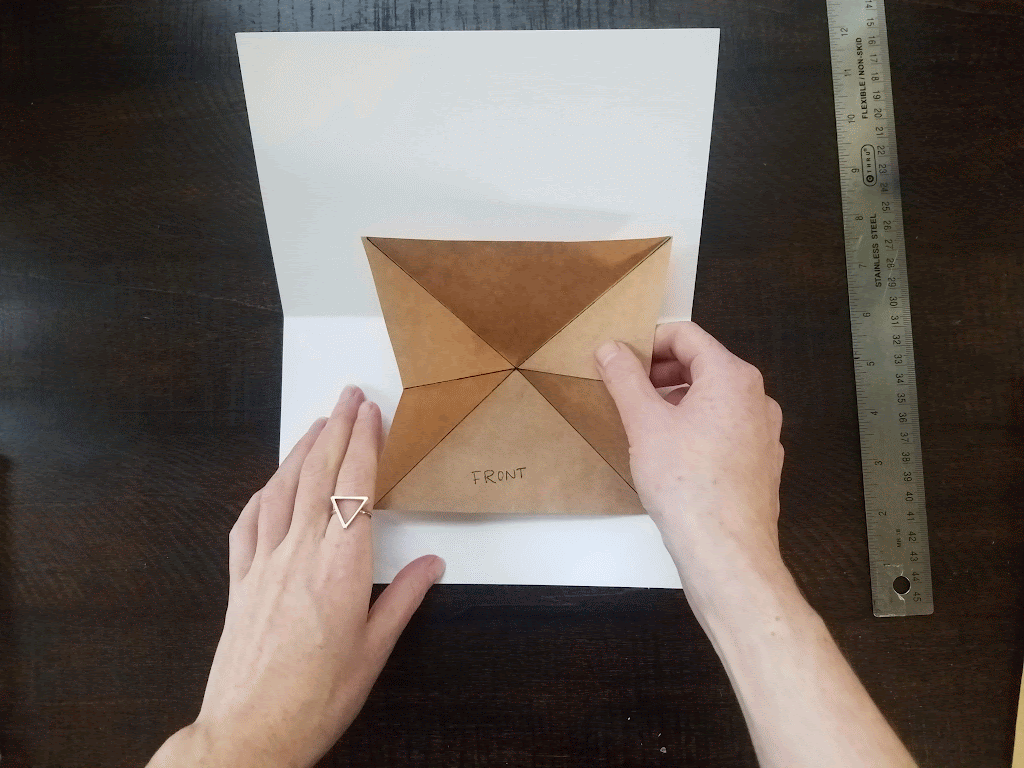
2. On the pop-up template, fold carefully along the dashed fold lines. Check both sides of the template for fold lines. Check out the Folding Tips! for visual instructions.
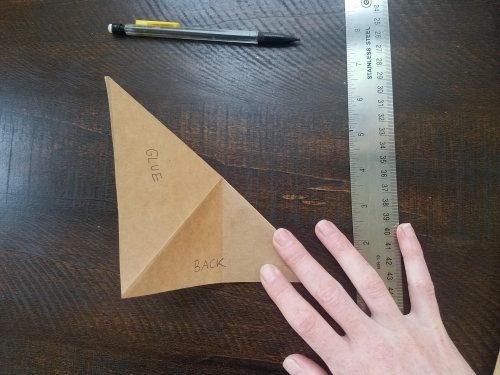
3. Apply glue to the folded pop-up template only where it says “GLUE”. Place the pop-up template into the inner fold of the card. Press and hold the glued areas for 10 seconds. Allow to dry. Once dried, slowly open and close your card to ensure the pop-up is folded how you would like.
4. Cut reflective paper into shapes that will go inside your pop-up card. Once cut into pieces, remove the white backing to reveal the sticky side. Open your pop-up card and stick your pieces of reflective paper onto the pop-up template however you would like. Avoid sticking reflective paper over the fold lines so that your card will fold and pop-up easily. ;Lastly, remove the blue protective film to reveal the shiny side of the reflective paper.
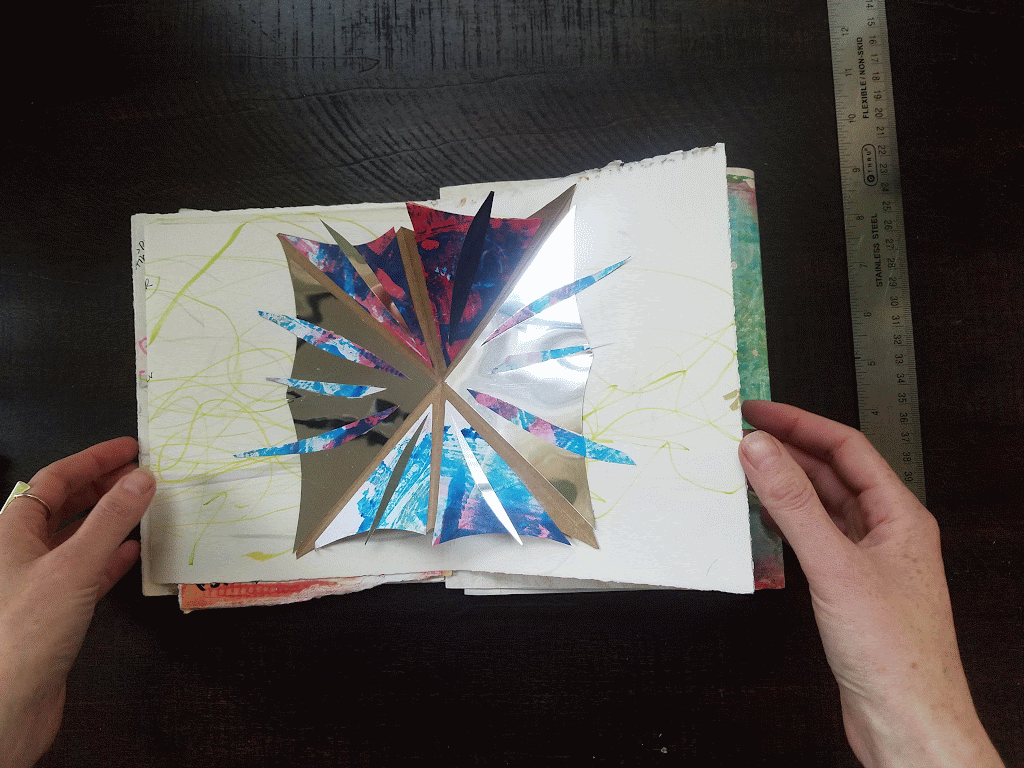
5. Close your card. Decorate the front and back of the card. Consider a short message or image for the front of the card that will make you feel joyful. Include your name and date on the back of the card.
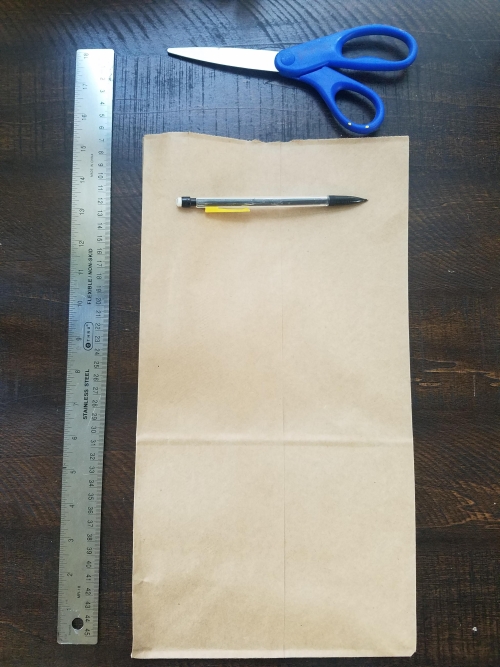
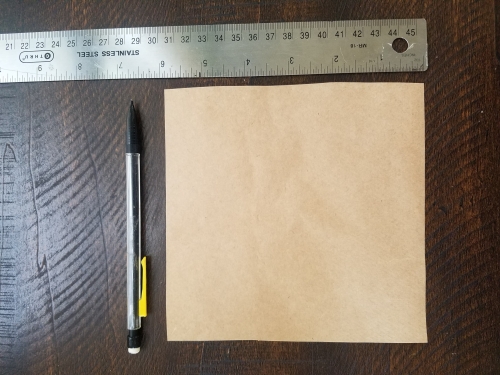
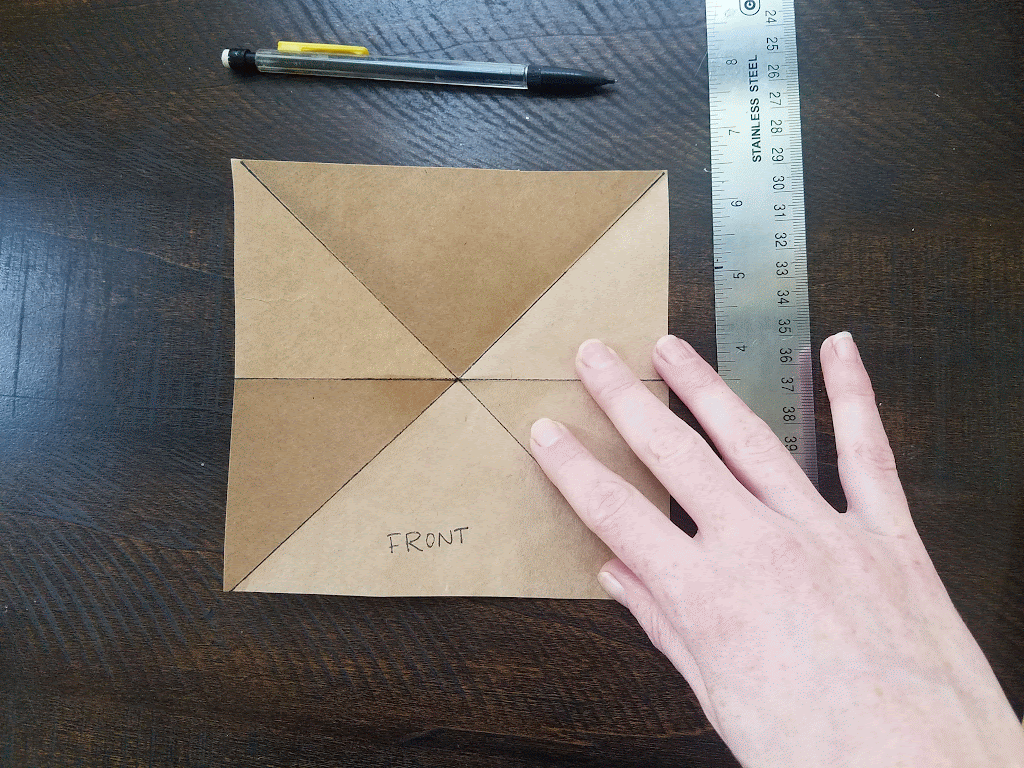
Download and print the pop-up template. Don’t have a printer? Make your own template with a paper bag! Measure and cut a 6” x 6” square piece of paper (could be from a brown paper bag like pictured). With a pencil, lightly label one side “BACK.”
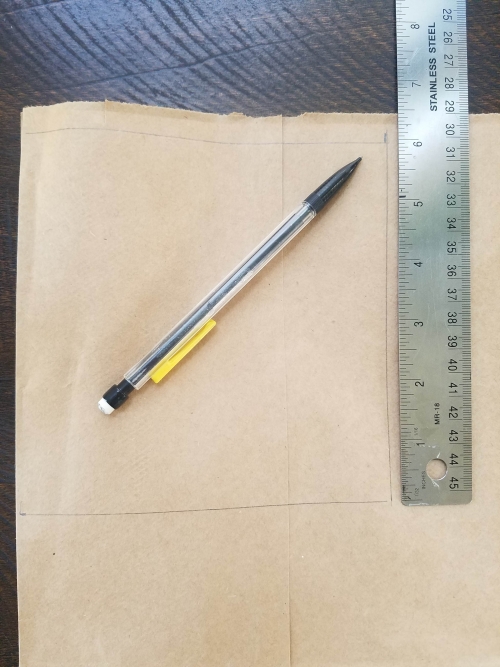
Whether you printed or made your own template, here’s how to fold your pop-up template: Start by laying the square flat on your work surface with the “BACK” side facing up. Fold the square in half so the top edge meets the bottom edge. Fold your crease firmly.
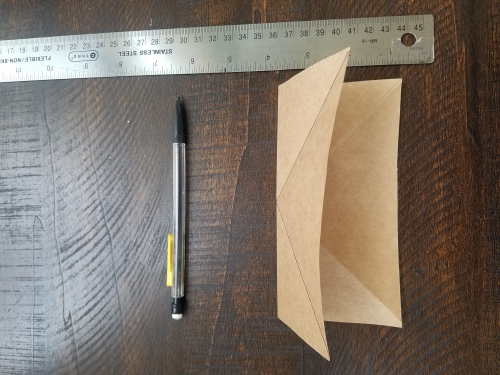
Open the square. Flip it over so the “BACK” side is against the work surface. Fold diagonally so the top left corner meets the bottom right corner. Open the square and fold diagonally in the opposite direction, so the top right corner meets the bottom left corner. Fold your creases firmly.

Open the square. Bring the middle of each outside edge up and towards each other to create a folded triangle. This will create the pop-up effect in your card.
This activity was designed by Brooke Scibelli, Family & Art Lab Programs Coordinator.