Inspired by the 30+ portraits hanging in i’m yours: Encounters with Art in Our Times, this activity invites you to create your own handmade picture frame with recycled materials. Make a personalized frame for one of your favorite photographs or even your own drawing.
This activity is designed for children ages 5 and up and their grownups to work on together at home. Please note that this project involves using scissors to cut cardboard.
Materials:


|
|
Steps: 1. |
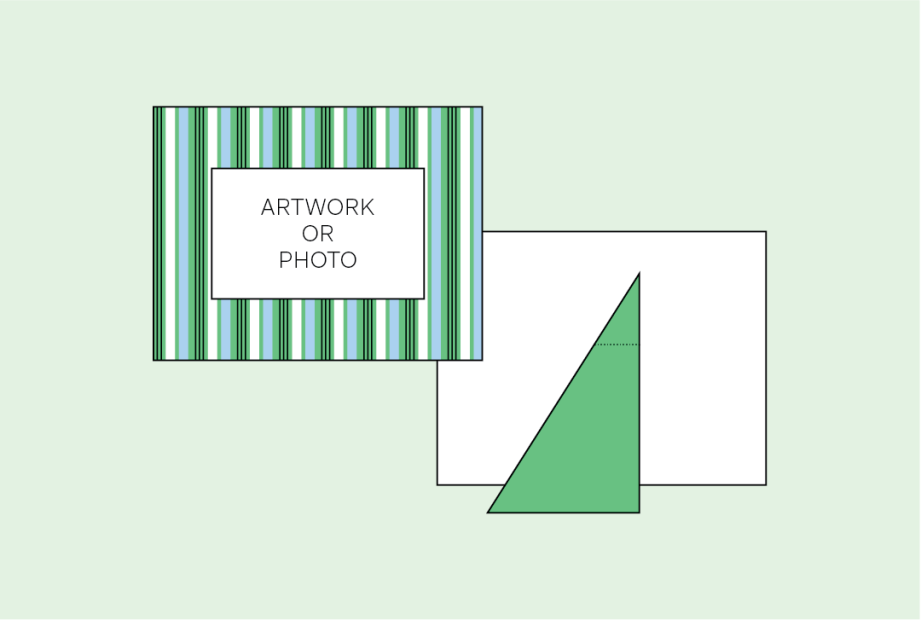
| 2. Cut a stand for your frame: Using a new piece of cardboard, measure and cut a rectangle that is roughly half the size of your frame. Using a pencil and ruler, draw a line from the upper left corner of the rectangle to the bottom right corner. Next, cut on the line. You only need one of the triangles for your frame. |
|
|
|
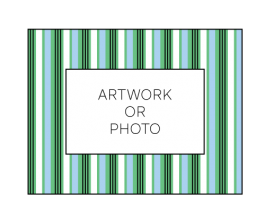
3. Using drawing materials, decorate the frame. Center your artwork on the back of the frame. Place the front of the frame on top so that your photo appears through the opening. Adjust until artwork is centered, then glue or tape the artwork in place onto the back. Tape will make it easier to change drawings or pictures in the frame. |
|
|
4. Use glue or tape to attach the triangular piece of cardboard to the back of the frame. Attach the narrowest part of the triangle to the center of the backing for the frame to stand. Bend the cardboard stand as needed for the best angle for your frame. |


This activity was created by Sergio Salicio-Lupiañez, Visitor Assistant.
Share your art with friends and family and on social media with #ICAArtLab or email us at familyprograms@icaboston.org.